
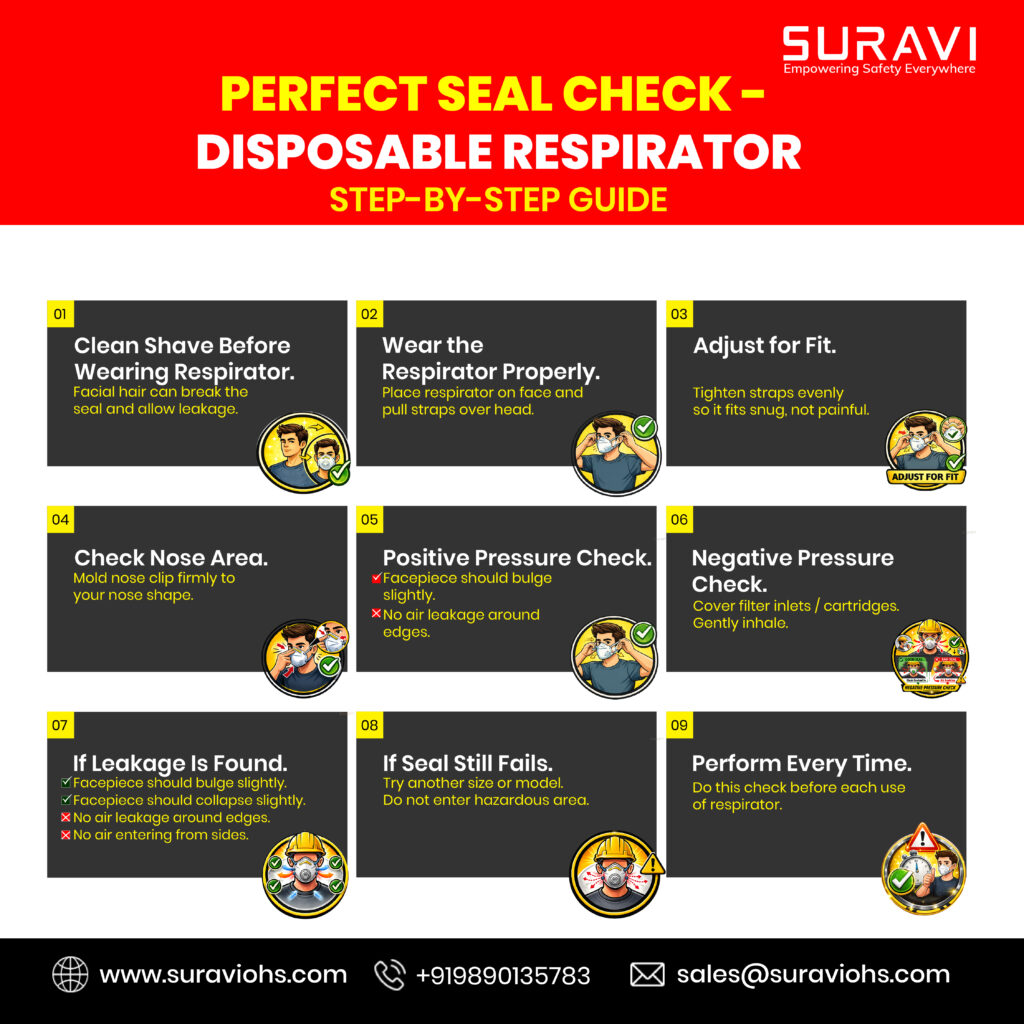
Ensuring a proper seal is the most critical step in respiratory protection. Use this 9-step guide to perform a successful seal check every time you wear a disposable respirator.
Phase 1: Preparation and Fitting
- 01. Clean Shave Before Wearing: Facial hair can break the seal and allow hazardous leakage. Always ensure you are clean-shaven where the respirator touches the skin.
- 02. Wear Properly: Place the respirator firmly on your face and pull the straps over your head.
- 03. Adjust for Fit: Tighten the straps evenly so the mask fits snugly against your face without causing pain.
- 04. Check Nose Area: Use both hands to mold the metal nose clip firmly to the bridge of your nose for a custom fit.
Phase 2: The Pressure Checks
- 05. Positive Pressure Check: Exhale gently into the mask. The facepiece should bulge slightly, and you should feel no air leakage around the edges.
- 06. Negative Pressure Check: Cover the filter inlets or cartridges with your hands and gently inhale. The facepiece should collapse slightly inward.
Phase 3: Troubleshooting and Compliance
- 07. If Leakage Is Found: Re-adjust the nosepiece and straps. A successful check means the facepiece bulges/collapses correctly with no air entering or escaping from the sides.
- 08. If Seal Still Fails: Do not enter the hazardous area. Try a different size or a different respirator model to achieve a proper fit.
- 09. Perform Every Time: Safety is a habit. Perform this seal check before each use of your respirator.
Contact Suravi for Expert Safety Solutions
- Website: www.suraviohs.com
- Phone: +91 9890135783
- Email: sales@suraviohs.com